AI Baby Photo Editing Timeline: From Snap To Print
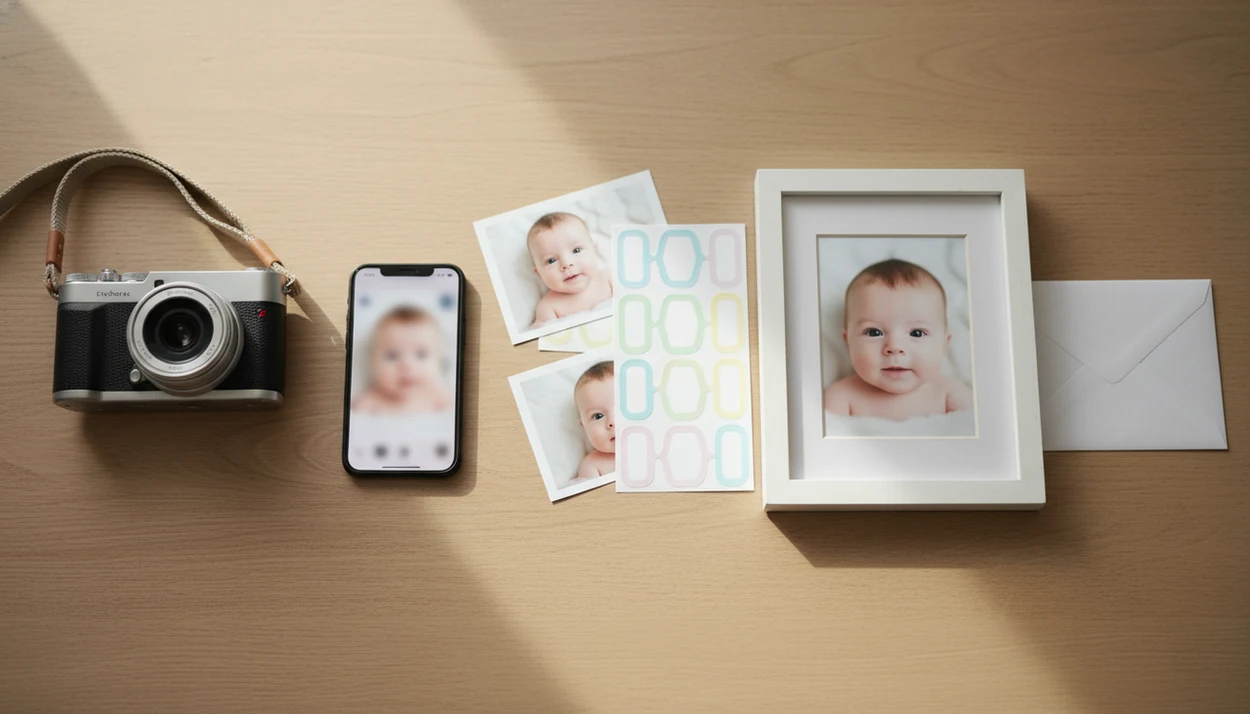
An AI baby photo editing timeline is the parent-friendly workflow from taking a clear baby photo to choosing edits, checking the face, exporting the file, and printing or sharing the keepsake. The best results come from starting with a sharp, well-lit source image and reviewing every AI change before saving.
> Baby Photo Art is a baby photo editor app that turns baby and newborn photos into milestone templates, stickers, portraits, and print-ready keepsakes for parents.
- Start with a bright, sharp photo because AI edits depend heavily on the original image.
- Use AI for repetitive fixes like background cleanup, lighting balance, templates, and portrait-style edits.
- Always review facial details, skin tone, crop, export size, and print quality before sharing.
AI Baby Photo Editing Timeline Definition For Parents
An AI baby photo editing timeline is the full path from capture to finished keepsake: take or select a photo, upload it, apply an AI edit, review the result, export it, then share or print it. It can describe one edited newborn portrait or a recurring monthly milestone series.
The timeline matters because baby photos are rarely studio-clean. A dim hospital-room photo may include a wrinkled white blanket and a rolling bassinet in the background. AI can help clean that up faster than manual editing, but it cannot replace a parent’s final check.
For parents, the safest workflow is small adjustments, not a new baby.
Five AI Baby Photo Workflow Facts Before You Start
Before you start, know that AI baby editing depends heavily on the original photo and still needs parent review. Adobe’s 2024 Digital Trends report describes generative AI as a way teams accelerate content workflows and automate production tasks (https://business.adobe.com/resources/reports/digital-trends.html), which fits baby editing when the task is cleanup, layout, or resizing.
- A sharp, bright, uncluttered source photo usually gives the AI more usable detail.
- Common edits include background removal, lighting correction, skin tone balance, stickers, and milestone templates.
- Parents still choose the style, crop, export format, and final destination.
- Milestone and seasonal templates can turn separate photos into a photo series over time.
- Manual checks are still needed for faces, masks, crops, and print resolution.
A good AI-powered baby and newborn photo generator with stickers, milestone templates, and portrait-style edits for parents should deliver controlled keepsakes, not fantasy versions of a child.
How AI Baby Photo Editing Works Behind The Scenes
AI baby photo editing works by analyzing the uploaded image, identifying the baby and background, then applying model-guided edits or preset templates. The system may use face detection, subject separation, background recognition, lighting evaluation, and style transfer. In plain language, it tries to understand what should stay, what can change, and where the design should sit.
It does not truly understand your child. It predicts realistic-looking pixels from visual patterns, so a tiny hospital ID bracelet, a curl at the hairline, or a half-closed newborn eye can be misread.
Grand View Research estimated the global generative AI market at about $13.7 billion in 2023 (https://www.grandviewresearch.com/industry-analysis/generative-ai-market-report), which explains why these tools are appearing quickly. Still, baby images are personal family data. Before uploading, check the privacy setting and decide whether the photo belongs in a private folder.
Step 1: Choose A Source Photo For Baby Photo Editing Steps
Which baby photo should you start with? Choose the clearest image where the baby’s face is visible, the light is soft, and the background is not fighting for attention.
Good source photos can come from home, hospital, crib, or milestone snapshots. Soft window light often works better than a bright ceiling bulb. Visible eyes help the editor preserve expression. A relaxed mouth or sleepy face usually edits more naturally than a cry mid-motion.
Quick checklist:
- Pick the sharpest photo from the set.
- Check that eyes, mouth, and cheeks are visible.
- Avoid deep shadows across the face.
- Skip busy blankets when you have a cleaner option.
- Keep meaningful details, like the tiny hospital bracelet, if they matter.
AI can improve a phone snap, but it cannot fully rebuild a poor original. If you want capture tips first, the guide to how to make professional baby photos with phone covers the setup stage.
Step 2: Upload The Baby Photo And Pick An AI Edit
After choosing the photo, upload it, crop loosely, and position the baby so the face and body are not squeezed against the edge. This is the first major choice in an AI baby photo workflow: fast preset or more controlled manual adjustment.
| Edit type | Good for | Watch before saving |
|---|---|---|
| Milestone template | Monthly cards, 100 days, first birthday | Age, name, date, crop |
| Sticker design | Cute accents and simple themes | Sticker overlap on face or hands |
| Seasonal card | Holidays and family sharing | Text spacing and background match |
| Portrait-style edit | A softer keepsake from a phone snap | Face shape and skin texture |
| Simple cleanup | Removing clutter or fixing light | Mask edges and odd blur |
Tools like Baby Photo Art, Canva, and Picsart can help with different parts of this decision. For a baby-specific path, an AI baby photo generator from photo is usually easier than a broad design editor because the templates start closer to parent needs.
Step 3: Apply AI Baby Photo Edits And Manual Touch-Ups
During editing, AI may clean the background, adjust brightness, balance color, smooth harsh shadows, place stickers, align a template, or suggest a tighter crop. Parent choices still matter at every step.
Check the mask around hair, blankets, fingers, pacifiers, and tiny accessories. Re-run a style if the first version changes the baby’s cheeks too much. Heavy smoothing can erase natural skin texture, especially in a close-up newborn portrait.
Keep the baby’s face recognizable. That’s the line.
The CDC reports that about 1 in 33 U.S. babies are born with a birth defect (https://www.cdc.gov/birth-defects/about/index.html), which is one reason “perfect baby” editing language is careless. AI edits should support keepsake creation, not suggest every newborn image needs correction. For softer portrait edits, a tool that can make natural newborn portraits should still preserve the child’s actual features.
Step 4: Review Baby Faces, Skin Tone, And Print Details
Review is the trust step before export. Check eyes, mouth, hands, ears, hairline, birthmarks, eyelashes, and small newborn details before you share the image.
Then inspect the design. Read the template text aloud. Confirm the date, milestone age, name spelling, sticker placement, crop, and background edges. A one-month card near curled toes can look sweet, but the number should not cover the foot or bracelet.
Skin tone also needs a screen check. View the edit on your phone and, if possible, one larger screen. Bedside lamps can leave an orange cast on newborn cheeks, and some AI tools over-correct that into gray or pink.
Pew Research Center found in 2023 that 52% of U.S. adults were more concerned than excited about AI in daily life (https://www.pewresearch.org/internet/2023/08/28/growing-public-concern-about-the-role-of-artificial-intelligence-in-daily-life/). Careful review builds trust because the parent, not the model, approves the final image.
How To Use An AI Baby Photo Workflow From Snap To Print
Use this workflow when you want a finished keepsake without guessing what comes next. For first-time parents, the simplest path is often better than trying every filter in the app.
- Take or select a bright, sharp image with the baby’s face visible.
- Upload and crop with extra space around the head, toes, and any text area.
- Choose an edit style, such as cleanup, portrait, sticker design, or milestone template.
- Review the AI result for face shape, skin tone, hands, text, and background edges.
- Save a high-resolution version before ordering prints or making an album page.
- Export or share a web-friendly copy for messaging, social posts, or phone wallpaper.
For monthly projects, a baby milestone photo app can keep the series visually consistent from month one through the first birthday.
Step 5: Export, Share, Or Print The Baby Keepsake
The final step is choosing where the edited image will live. A social post, phone wallpaper, baby book page, framed print, announcement card, and monthly milestone set all need slightly different exports.
Save both a web-friendly version and a print-ready version when possible. JPEG works well for quick sharing. PNG is useful for designs with graphics, stickers, or text. For printing, keep the highest resolution available and avoid screenshots, since they can shrink the file without warning.
Before ordering, check names, dates, and milestone numbers one more time. Also check the crop. A 4x6 print can cut off the top of a knit hat if the design sits too close to the border.
For long-term memory keeping, the export is not an afterthought. It is the part that decides whether the edit still looks good in an album years later.
Common Baby Photo Editing Steps That Go Wrong
Most baby photo editing mistakes come from rushing the source photo, the face check, or the final export. The fixes are usually small, but they make the keepsake feel more natural.
- Blurry source photo: Choose another frame if the eyes are soft. AI may improve mild softness, but severe blur often stays visible.
- Over-stylized filter: Reduce the effect or switch to a cleaner portrait edit. Heavy filters can change skin tone and expression.
- Face distortion: Compare the edit with the original before saving. Re-run the edit if the mouth, ears, or eyes look unfamiliar.
- Tight crop: Leave room around hats, toes, and template text. Print borders are not forgiving.
- Tiny export: Save the largest file for print, then make a smaller copy for sharing.
Also check mismatched templates, wrong milestone ages, misspelled names, and dates. Baby editors are for keepsake images, not medical, identity, or official document correction.
Limitations
AI baby photo editing can be useful, but it is not reliable in every situation. Treat it as a parent-friendly workflow with review points, not a fully automatic promise.
- Poor lighting, motion blur, and heavy clutter can limit the final result before editing begins.
- Some tools may mishandle newborn facial details, hands, hair, bows, hats, blankets, or skin tones.
- One-click tools still need parent review and occasional manual correction.
- AI cannot guarantee realistic results for every baby photo.
- Privacy and child-image handling matter when uploading photos to third-party services.
- Print quality depends on export size, resolution, crop ratio, paper, and printer settings.
- Heavy smoothing can remove natural baby features that parents may want to remember.
- Templates can introduce errors in names, dates, ages, or seasonal wording.
A wrapped gift box near a play mat may look cute in a design, but the baby should still be the subject. Always check the final image before you share.
FAQ
What is an AI baby photo editing timeline?
An AI baby photo editing timeline is the workflow from taking or selecting a baby photo to editing, reviewing, exporting, sharing, or printing the finished keepsake.
How do AI baby editors work?
AI baby editors analyze the photo, identify the baby and background, then apply cleanup, templates, stickers, or portrait-style edits based on visual patterns.
Which baby photo should I upload?
Upload a bright, sharp image where the baby’s face is clearly visible and not covered by blankets, hands, shadows, or heavy motion blur.
Can AI fix blurry baby photos?
AI may improve mild softness, but it cannot fully rescue a severely blurry baby photo with missing facial detail.
Are AI baby photos safe to upload?
Safety depends on the app’s privacy practices, storage settings, and sharing controls. Review child-image handling before uploading personal baby photos.
What size baby photo prints best?
Print quality depends on resolution, crop ratio, and export settings. Save the highest-resolution version available before ordering prints.
Do milestone templates need editing?
Yes. Review names, dates, ages, crop, sticker placement, and text spacing before saving or printing a milestone template.
Is AI editing better than filters for baby photos?
AI editing can be more useful than basic filters because it can recognize subjects, clean backgrounds, and apply templates. Filters mainly change the whole image’s color or style.